An Overview of PheedLoop's Registration System
This article accompanies the General Registration Overview video tutorial. Both the video and article cover everything you need to know about PheedLoop's registration system. Broad definitions for Categories, Tickets, Registrants, Ticket Holders, Attendees and User Credits are provided, ensuring you won't get lost while setting up registration.
By the end of this guide, you should feel comfortable with all core registration elements and how they interact with one another.
What You'll Learn
Registration Categories
Registration Categories are the foundation of your event's registration process. They guide people through the steps that turn website visitors into confirmed attendees. Setting up your Categories correctly makes event management easier, helping you collect the right information, support group registrations, control ticket availability, and keep everything organized.
By default, PheedLoop provides two Categories: Attendee and Virtual Attendee. These are just starting points; you can rename, customize, or remove them entirely. Common examples include Member/Non-Member, VIP, In-Person, or Virtual Attendance.
Each Category contains one or more Tickets. Because Tickets can be shared across multiple Categories, you can create one ticket type (such as a Full Day Pass) and assign it to several Categories at once.
How to Create a Registration Category
- From the Event Dashboard, navigate to Registration > Categories
-
Select Create
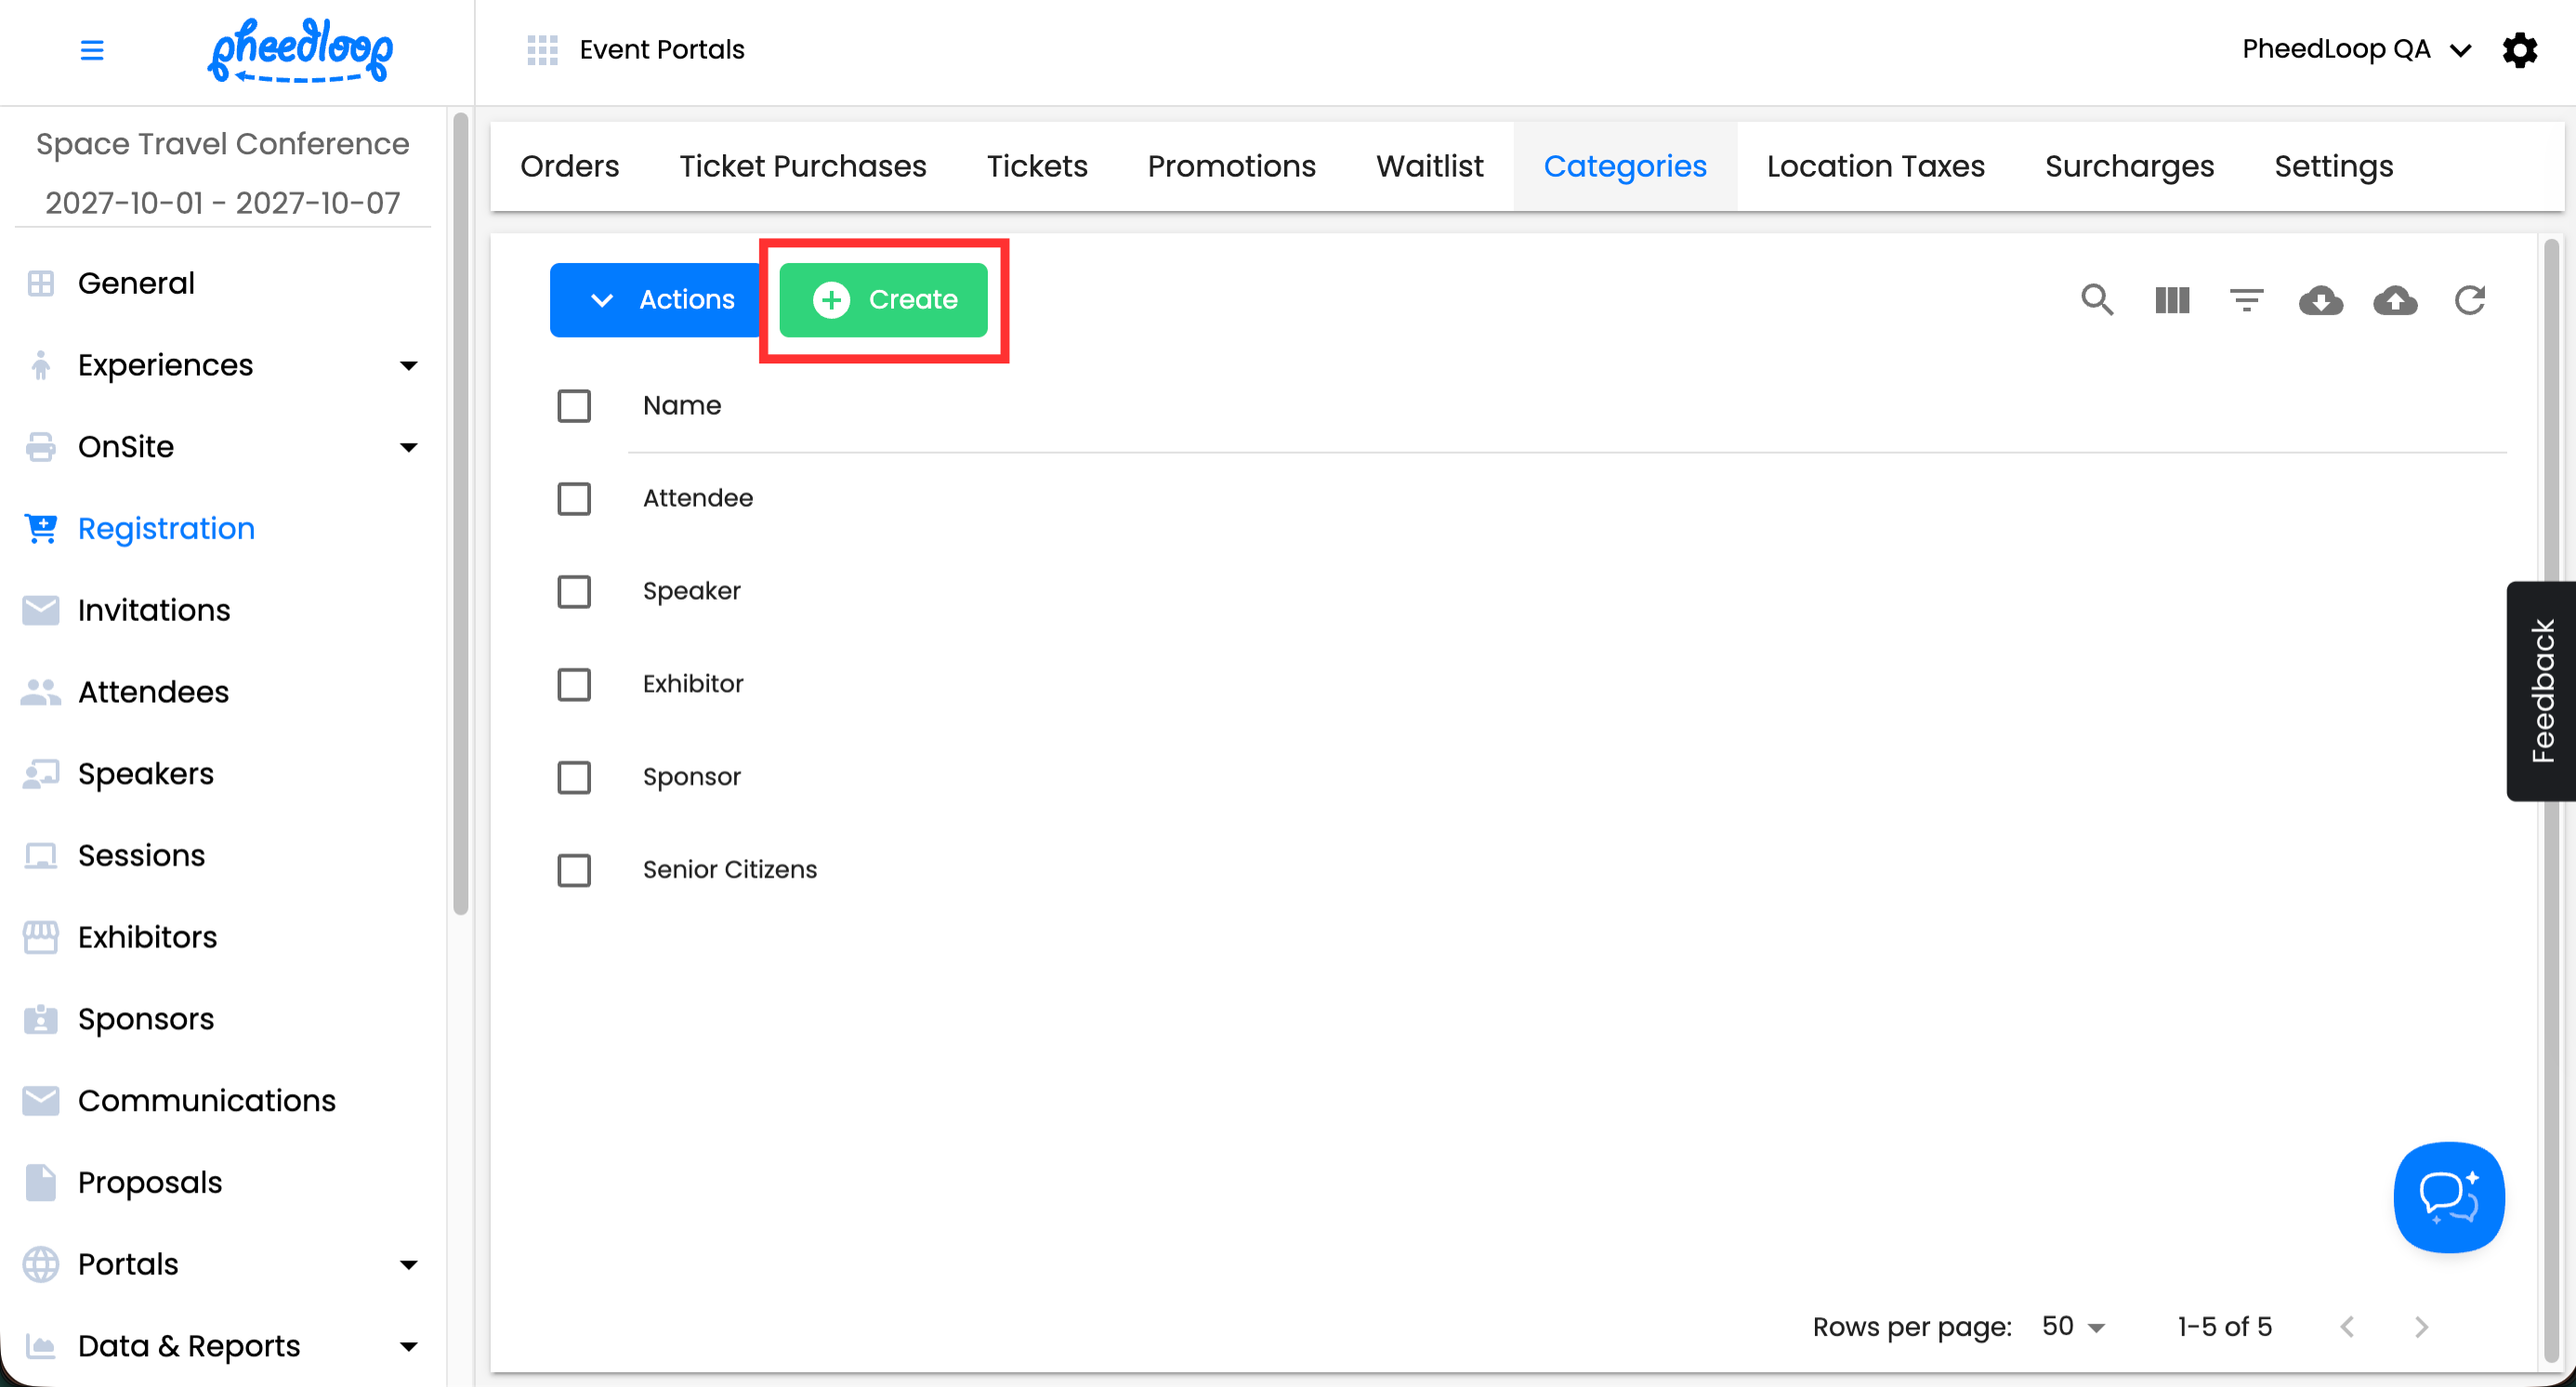
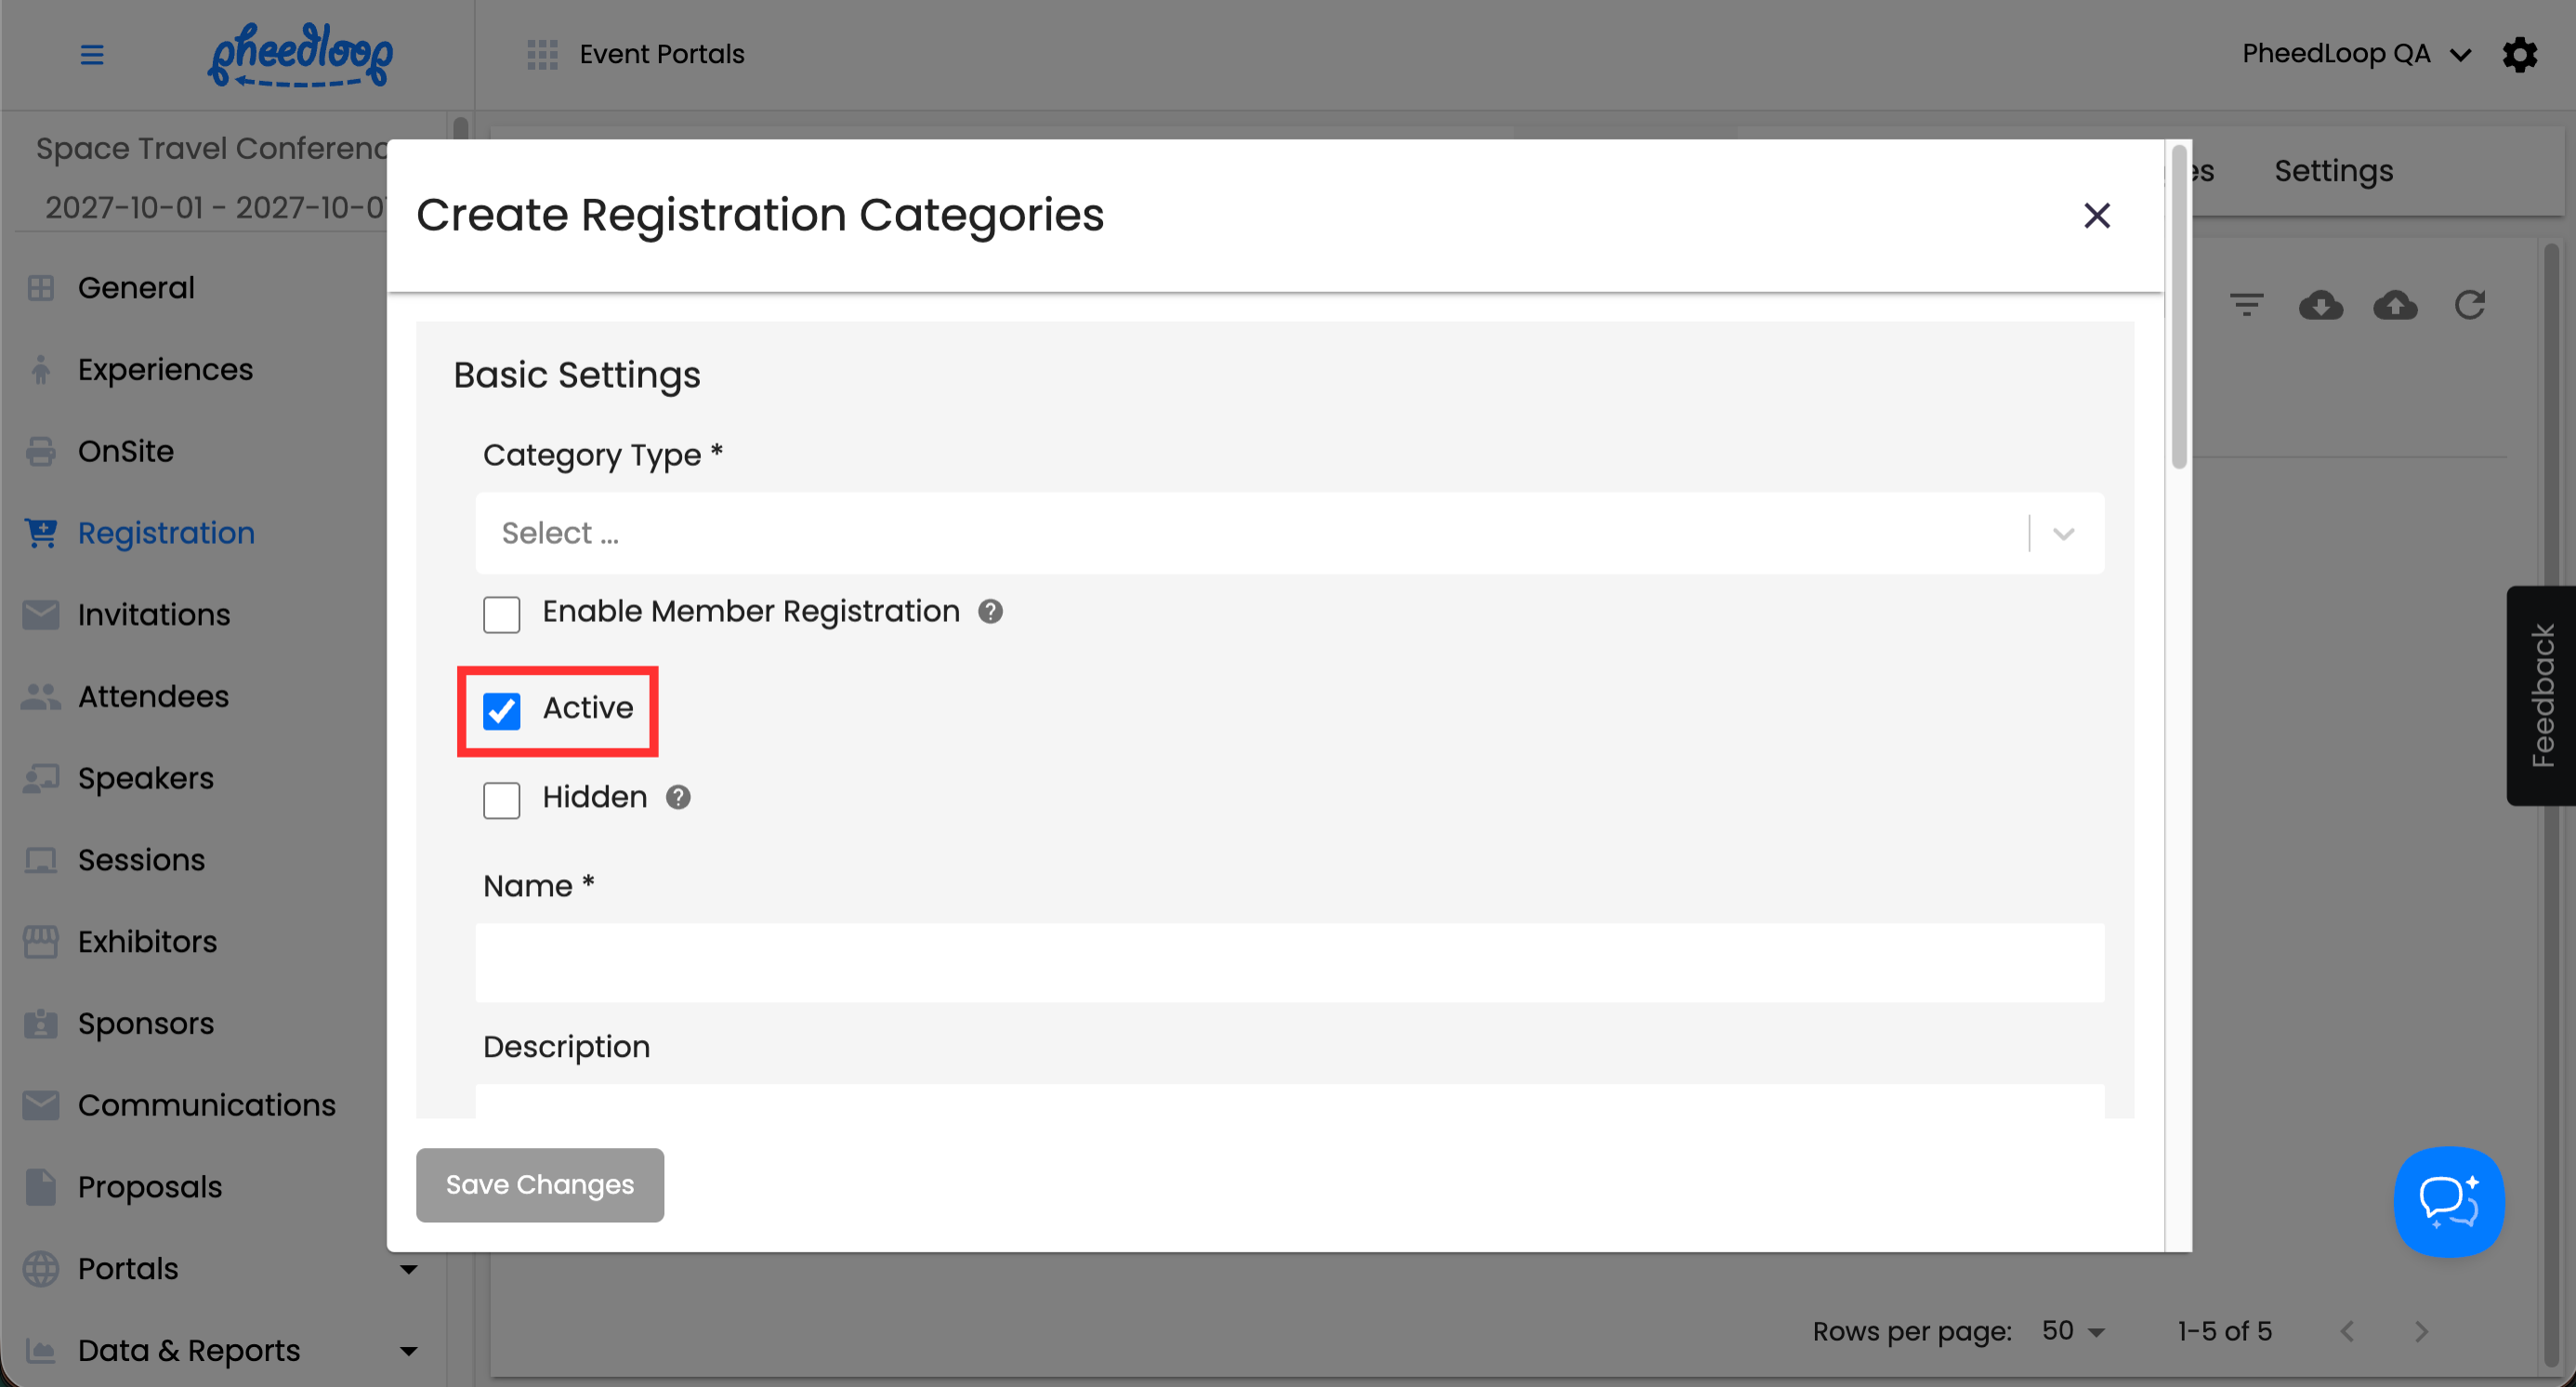
- Ensure the Active checkbox is toggled on
-
Inactive categories won't appear on the Event Website.
-
-
Enter a Name and Description to help attendees understand the category
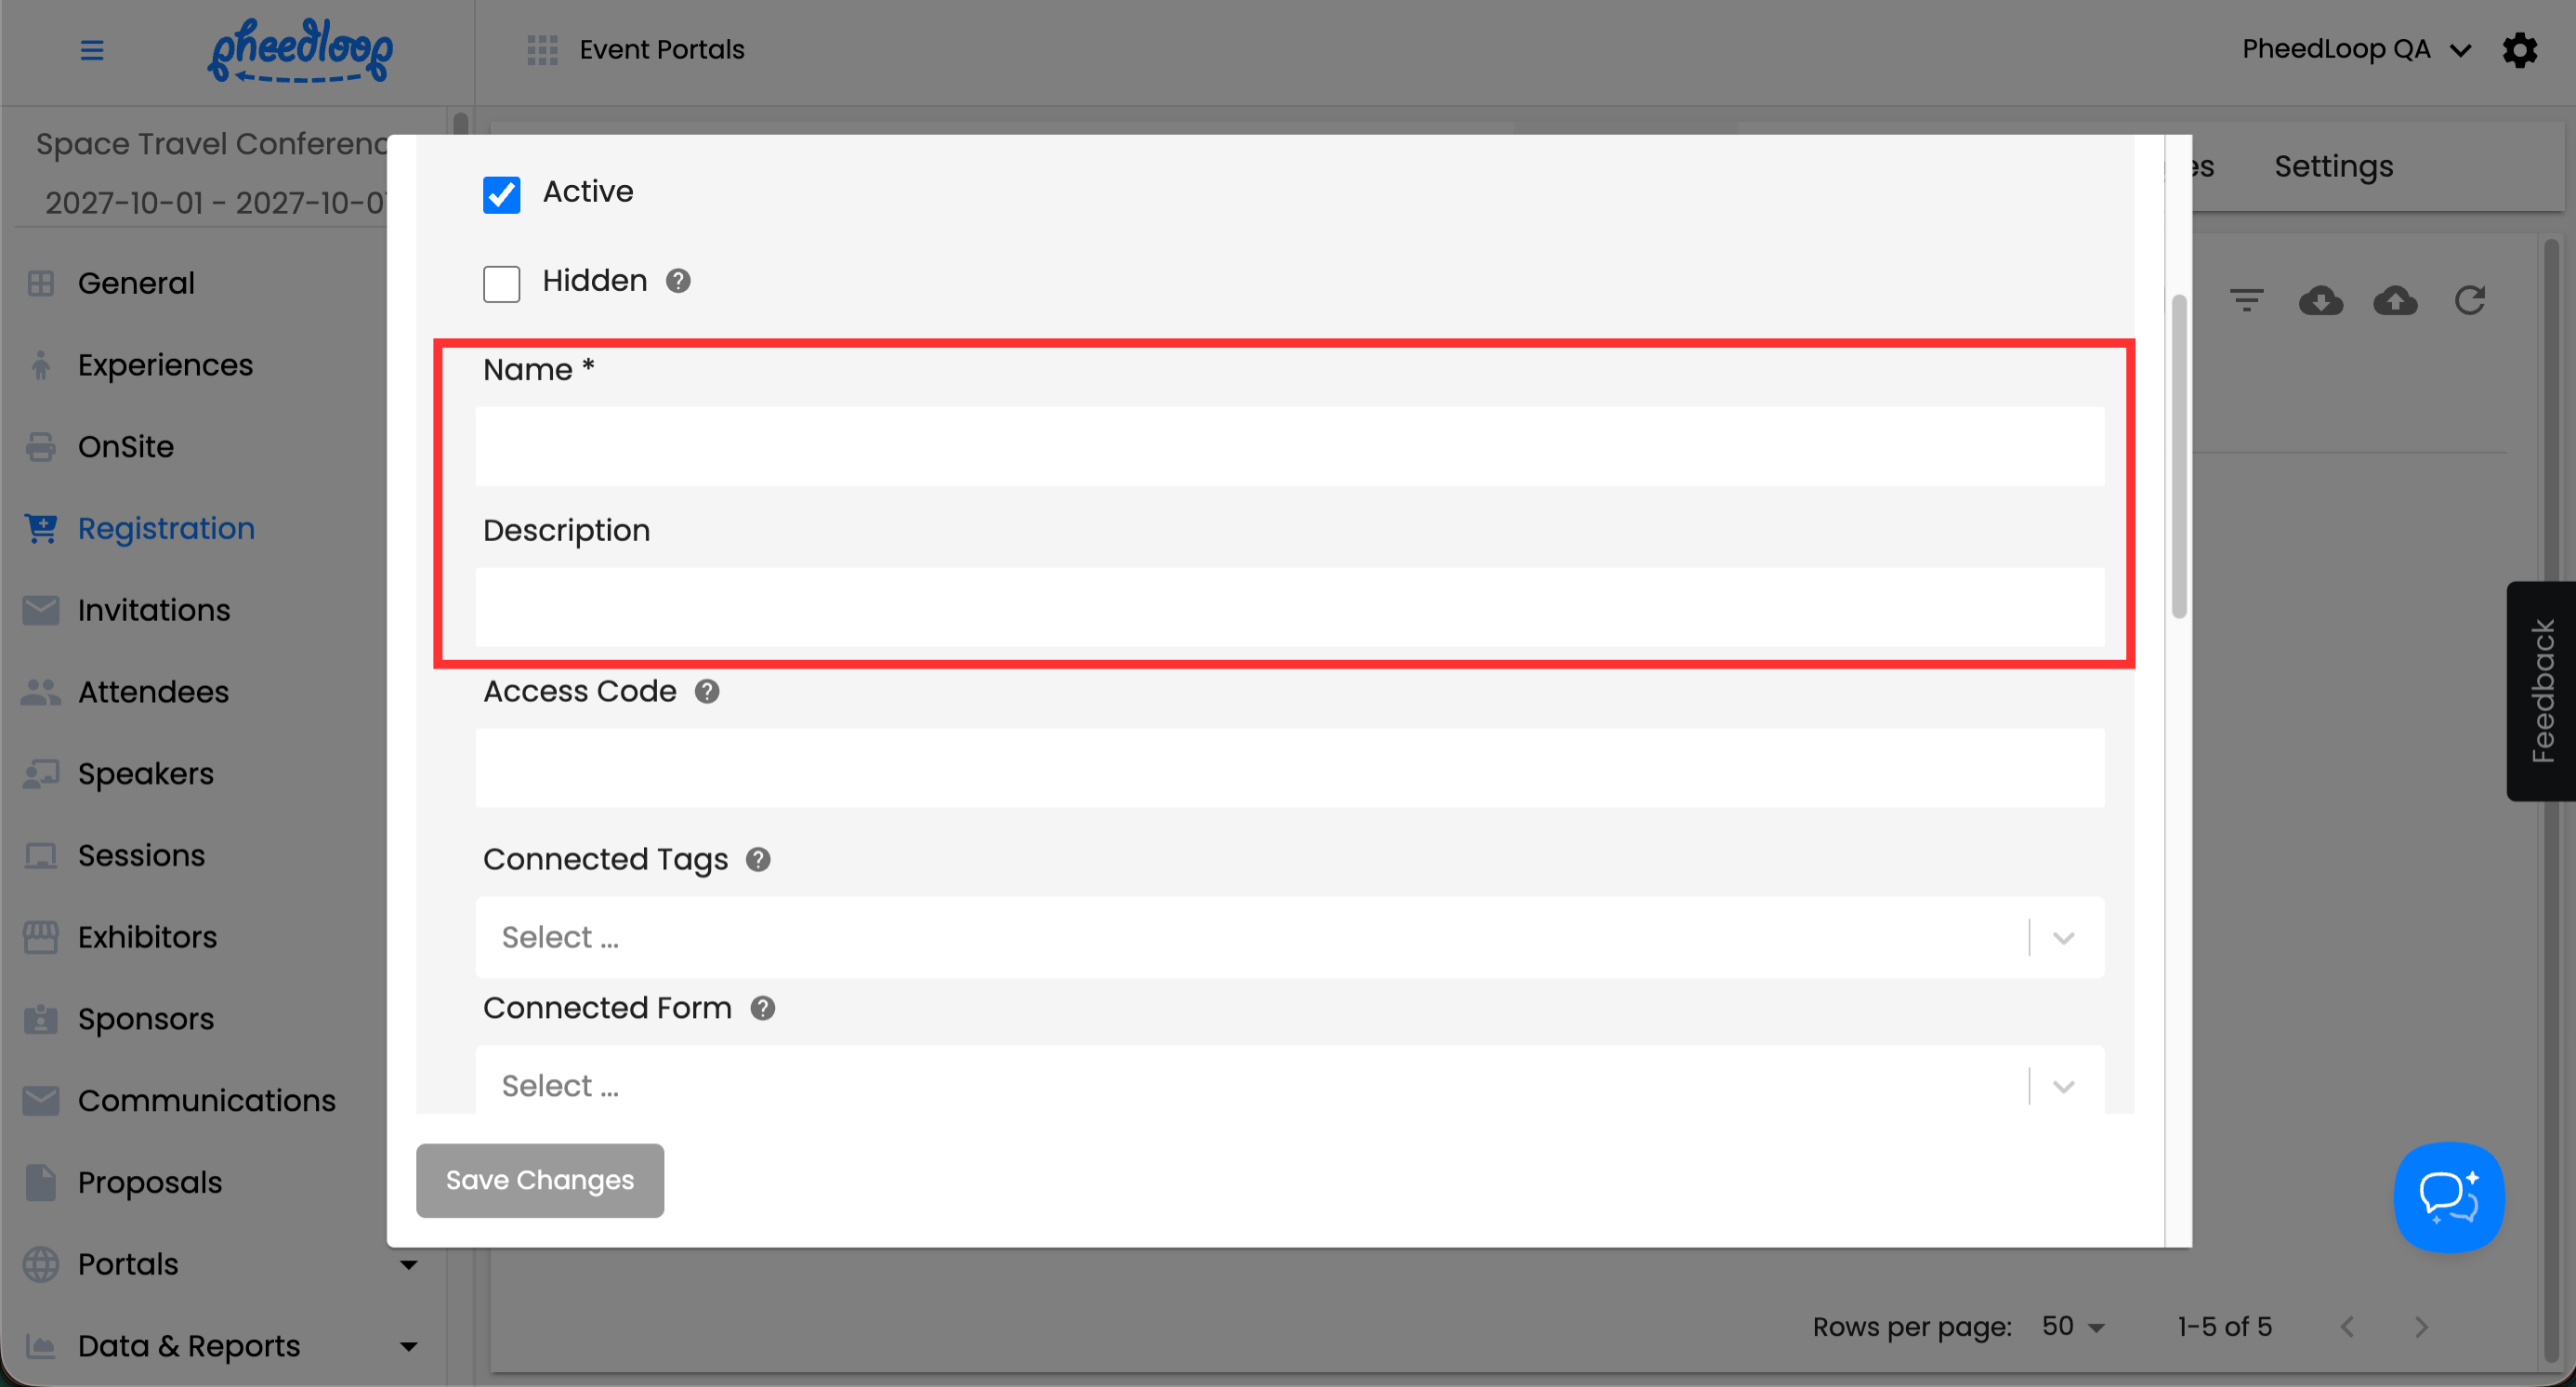
- Select Save Changes


Collecting Attendee Information
Within each Category, you can configure which information fields are collected from registrants during the Details step. Available fields include organization, title, address, designation, pronouns, and more. This is located under the Details section. Toggle on Collect for any field you want to gather, and Require to make it mandatory. Select Save Changes when done.

Tickets
Tickets allow registrants to attend your event upon purchase. Every Ticket must be assigned to at least one Registration Category.
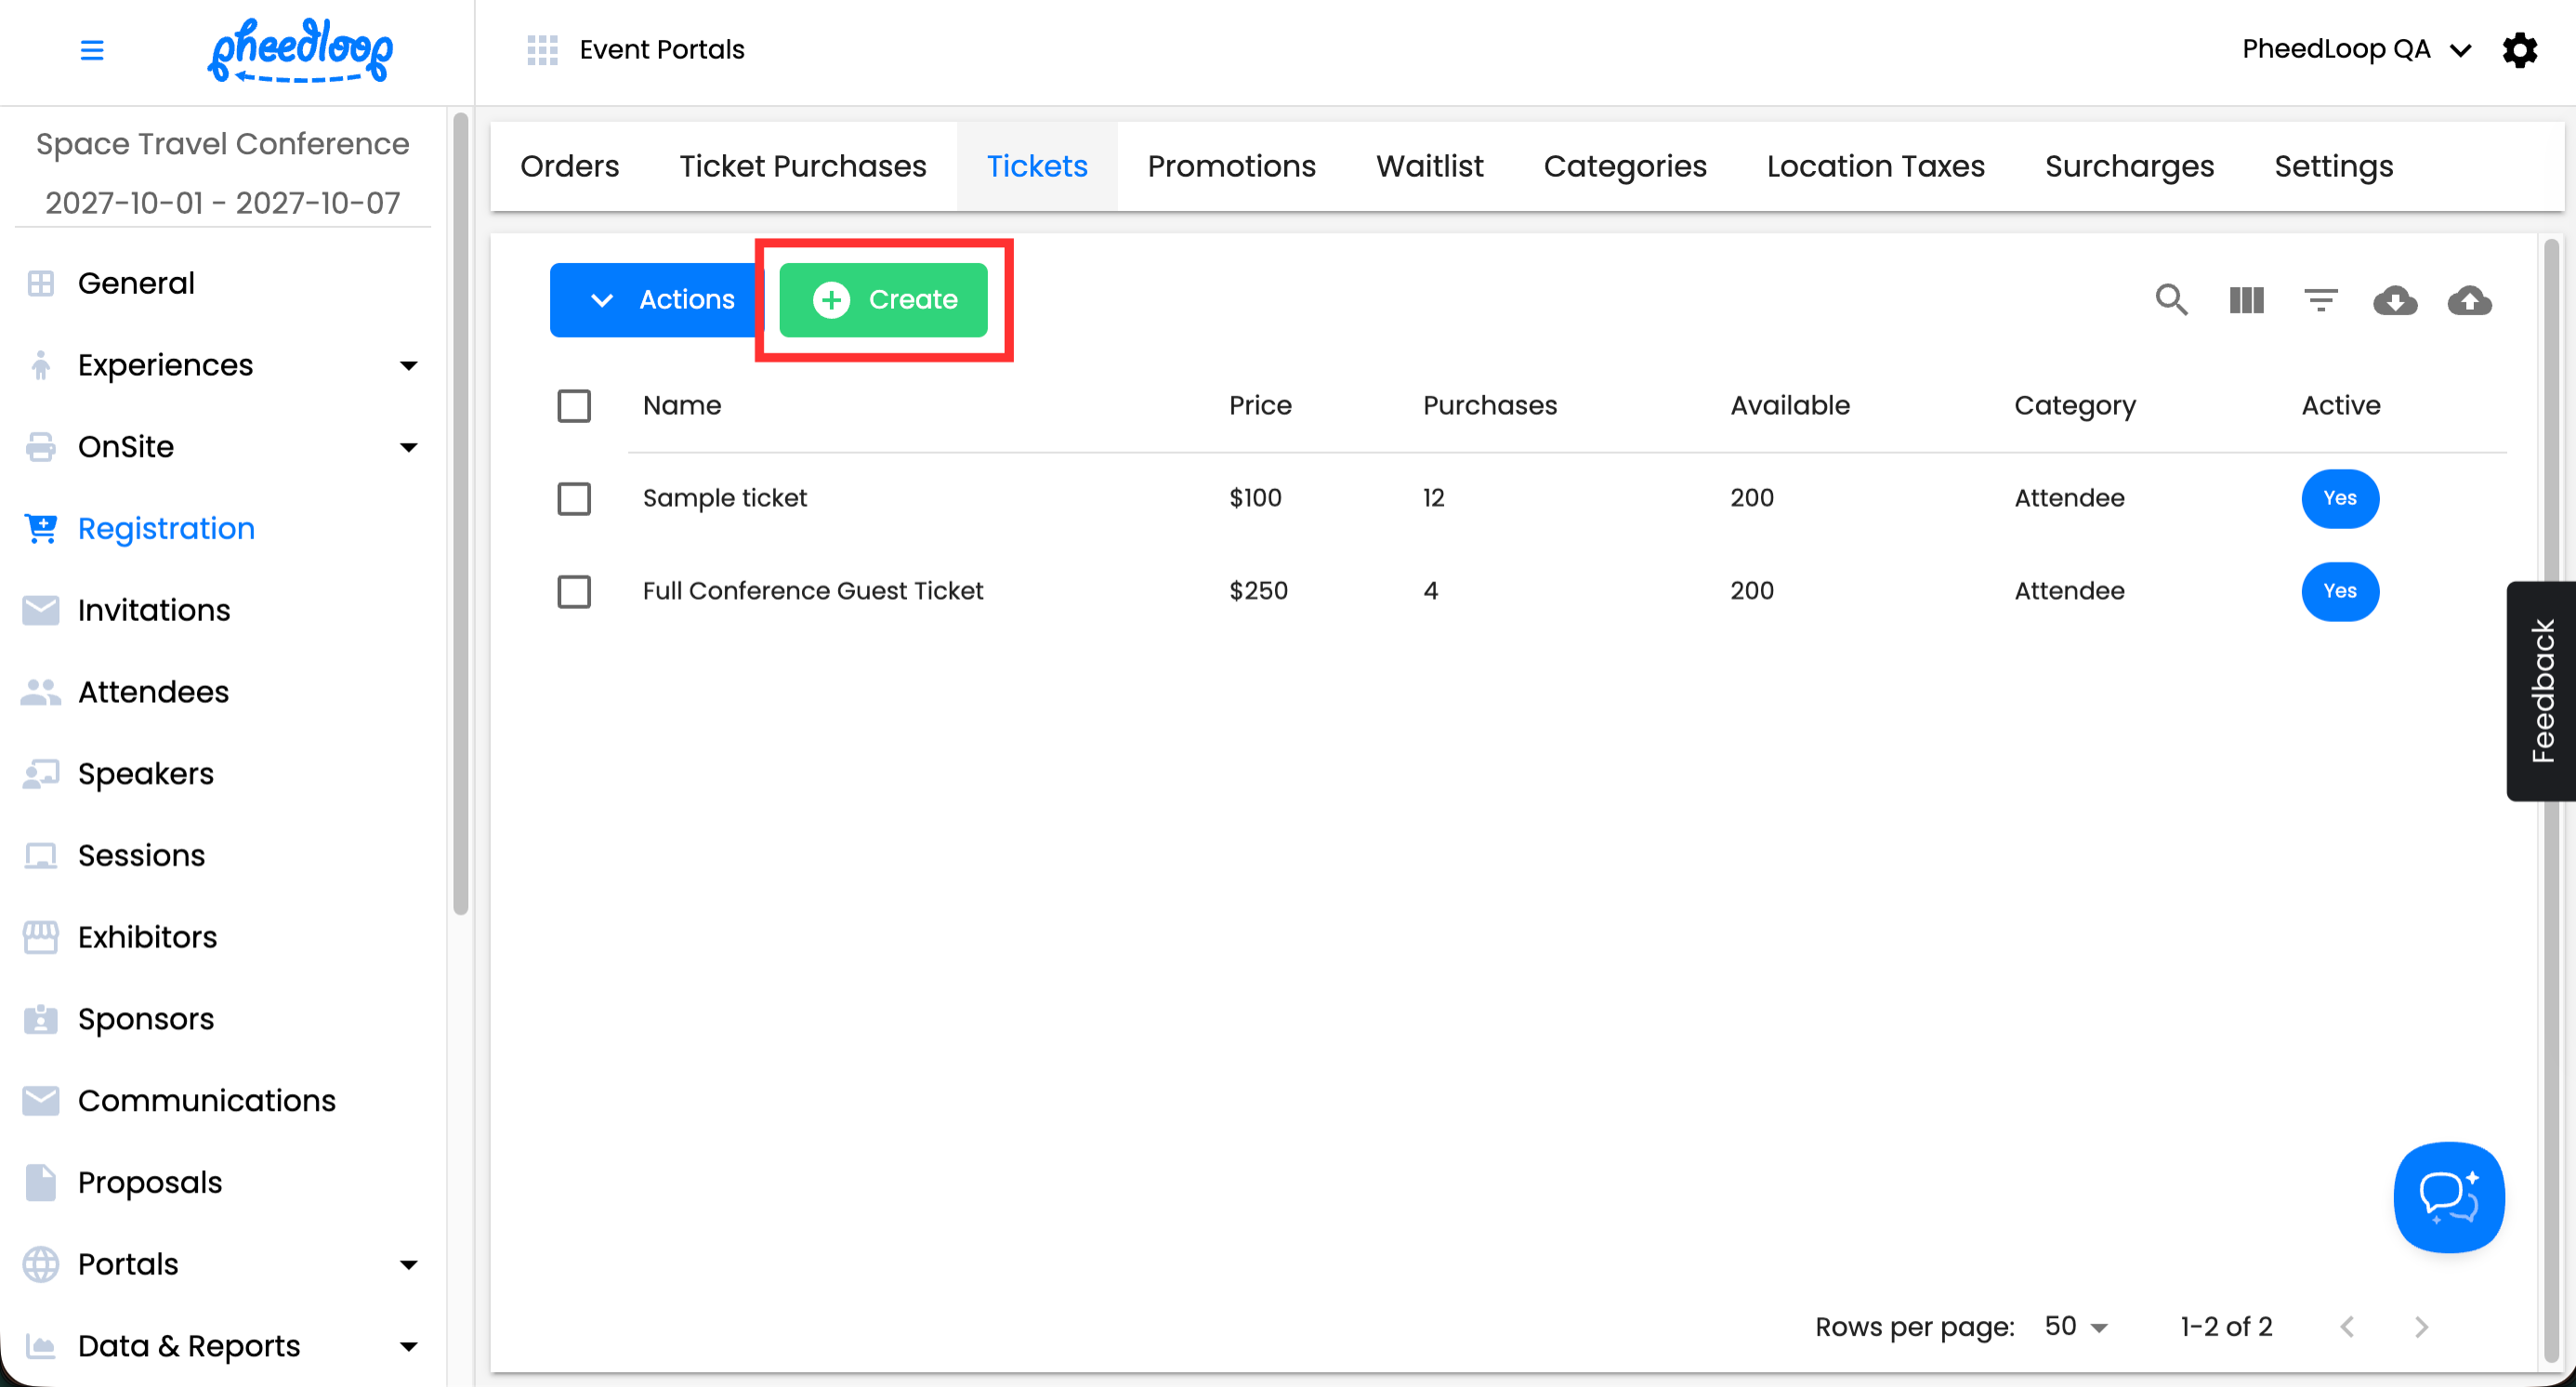
How to Create a Ticket
- From the Event Dashboard, navigate to Registration > Tickets
-
Select Create
-
Toggle on Activate Ticket
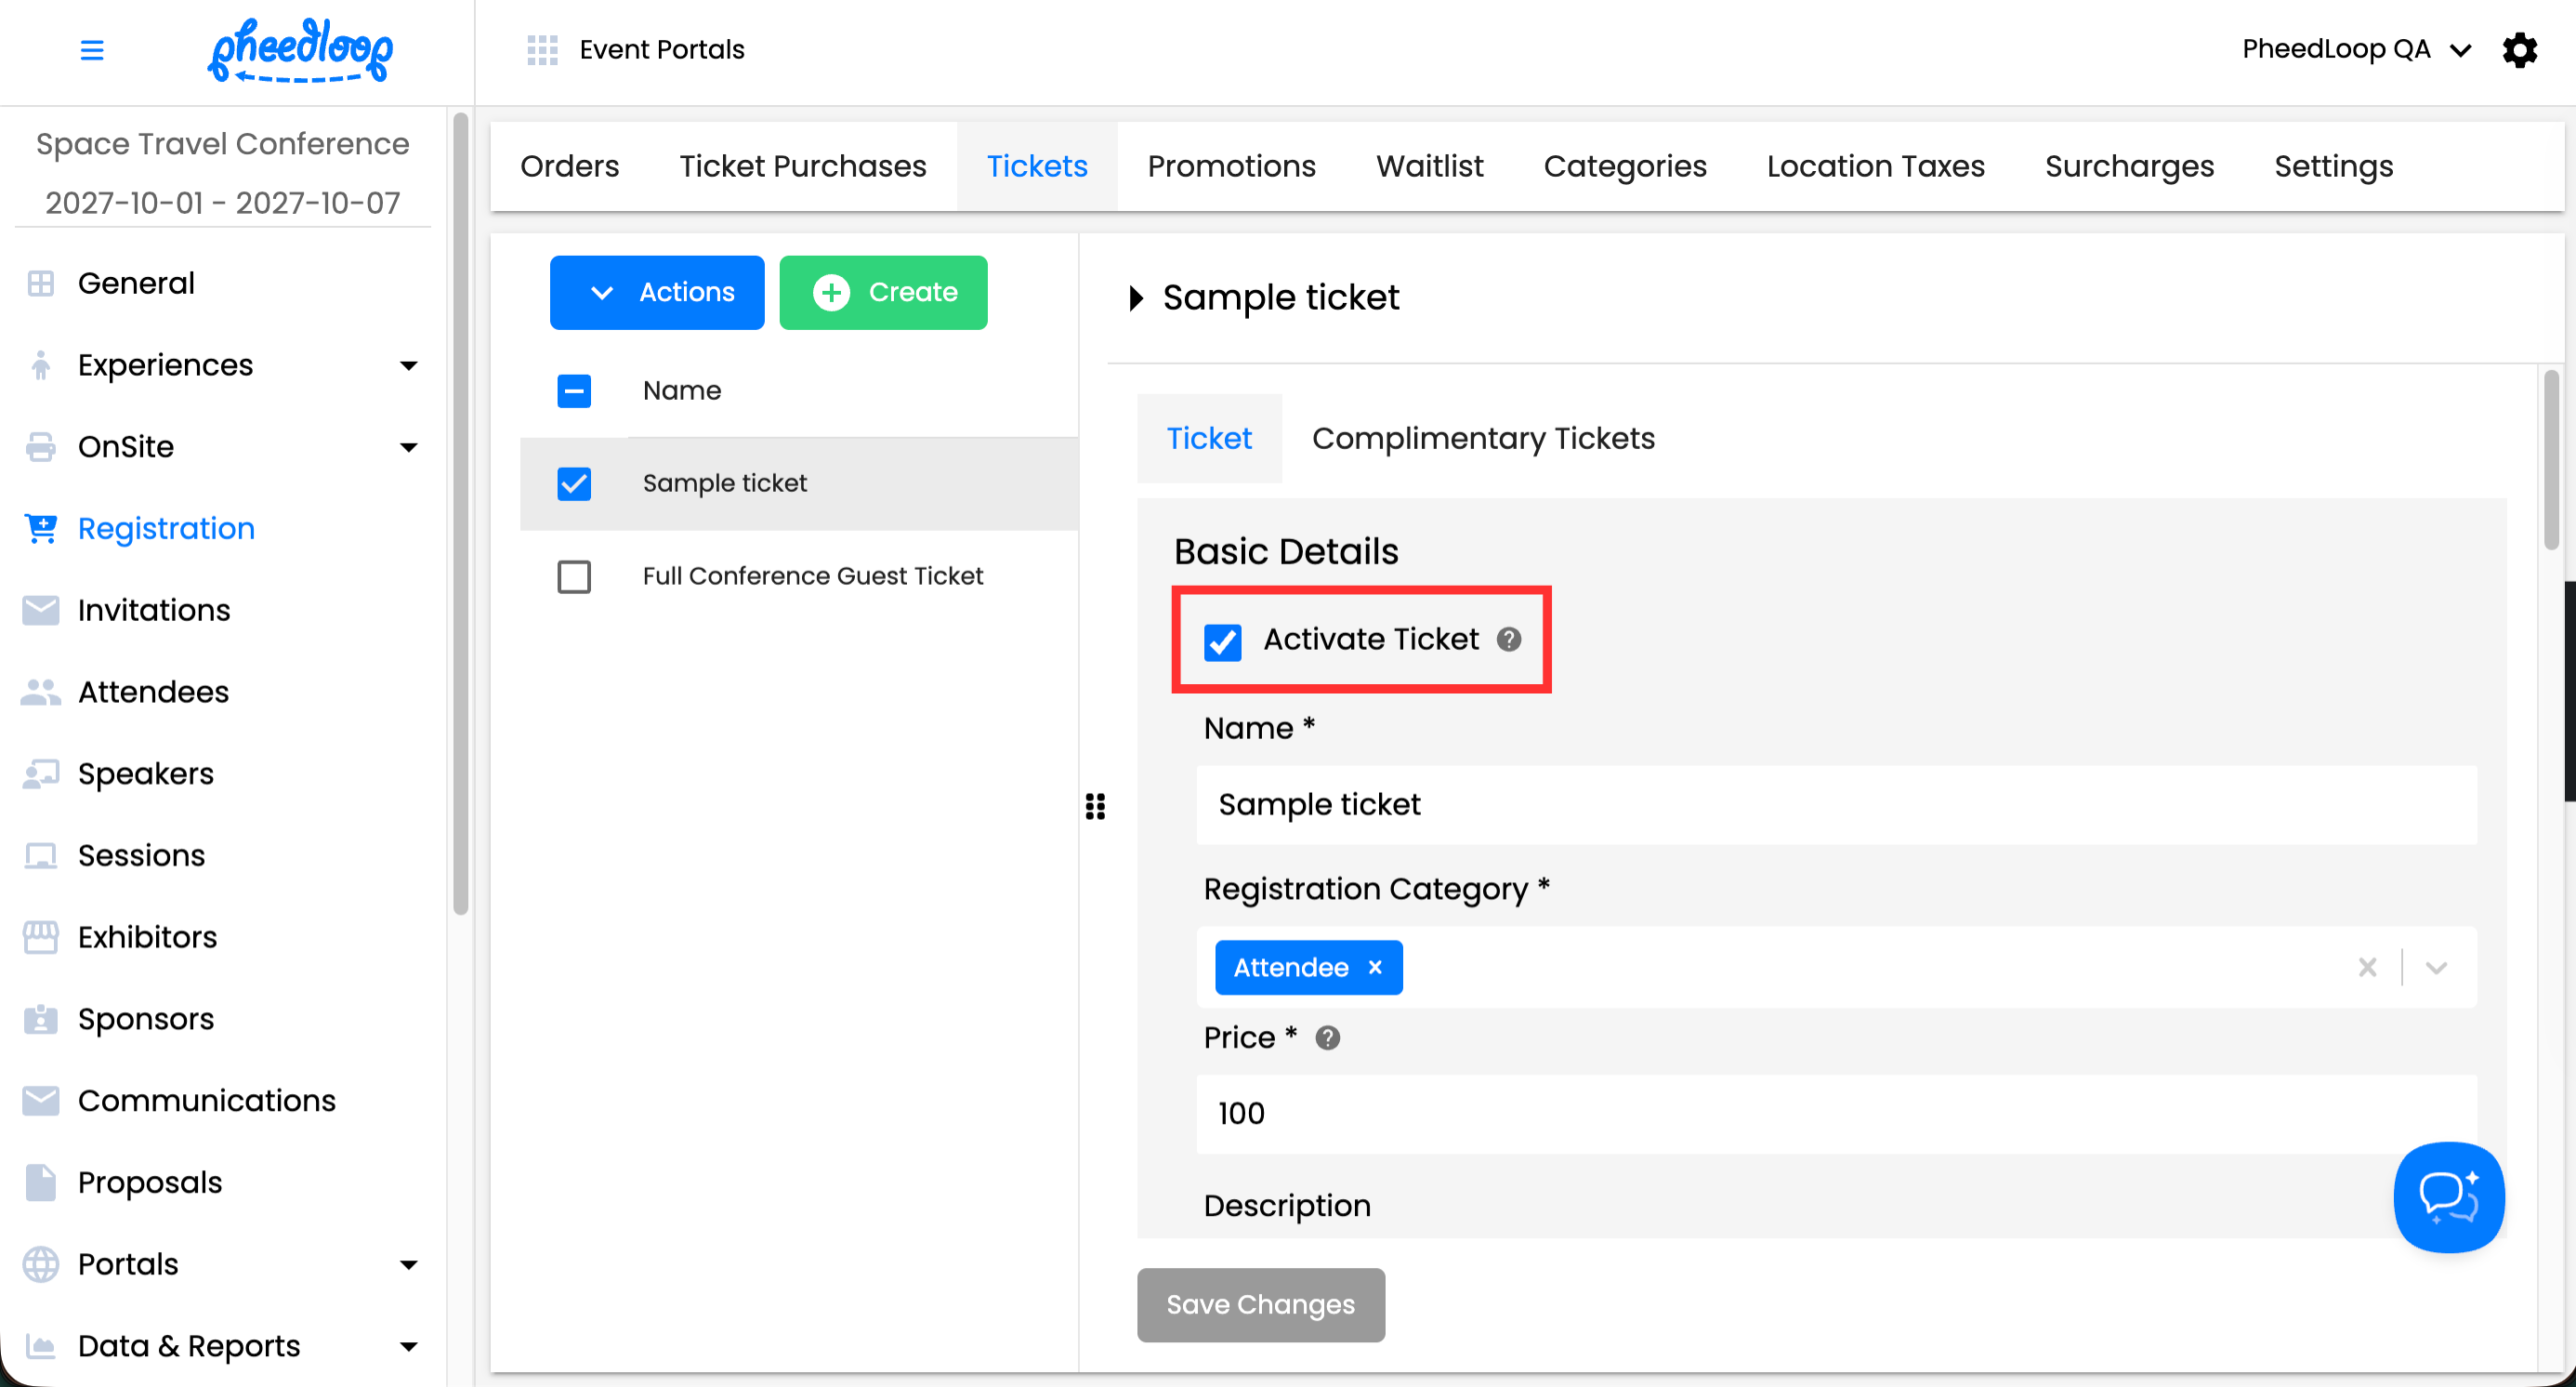
-
Enter the Ticket Name and assign it to a Category using the Registration Category field
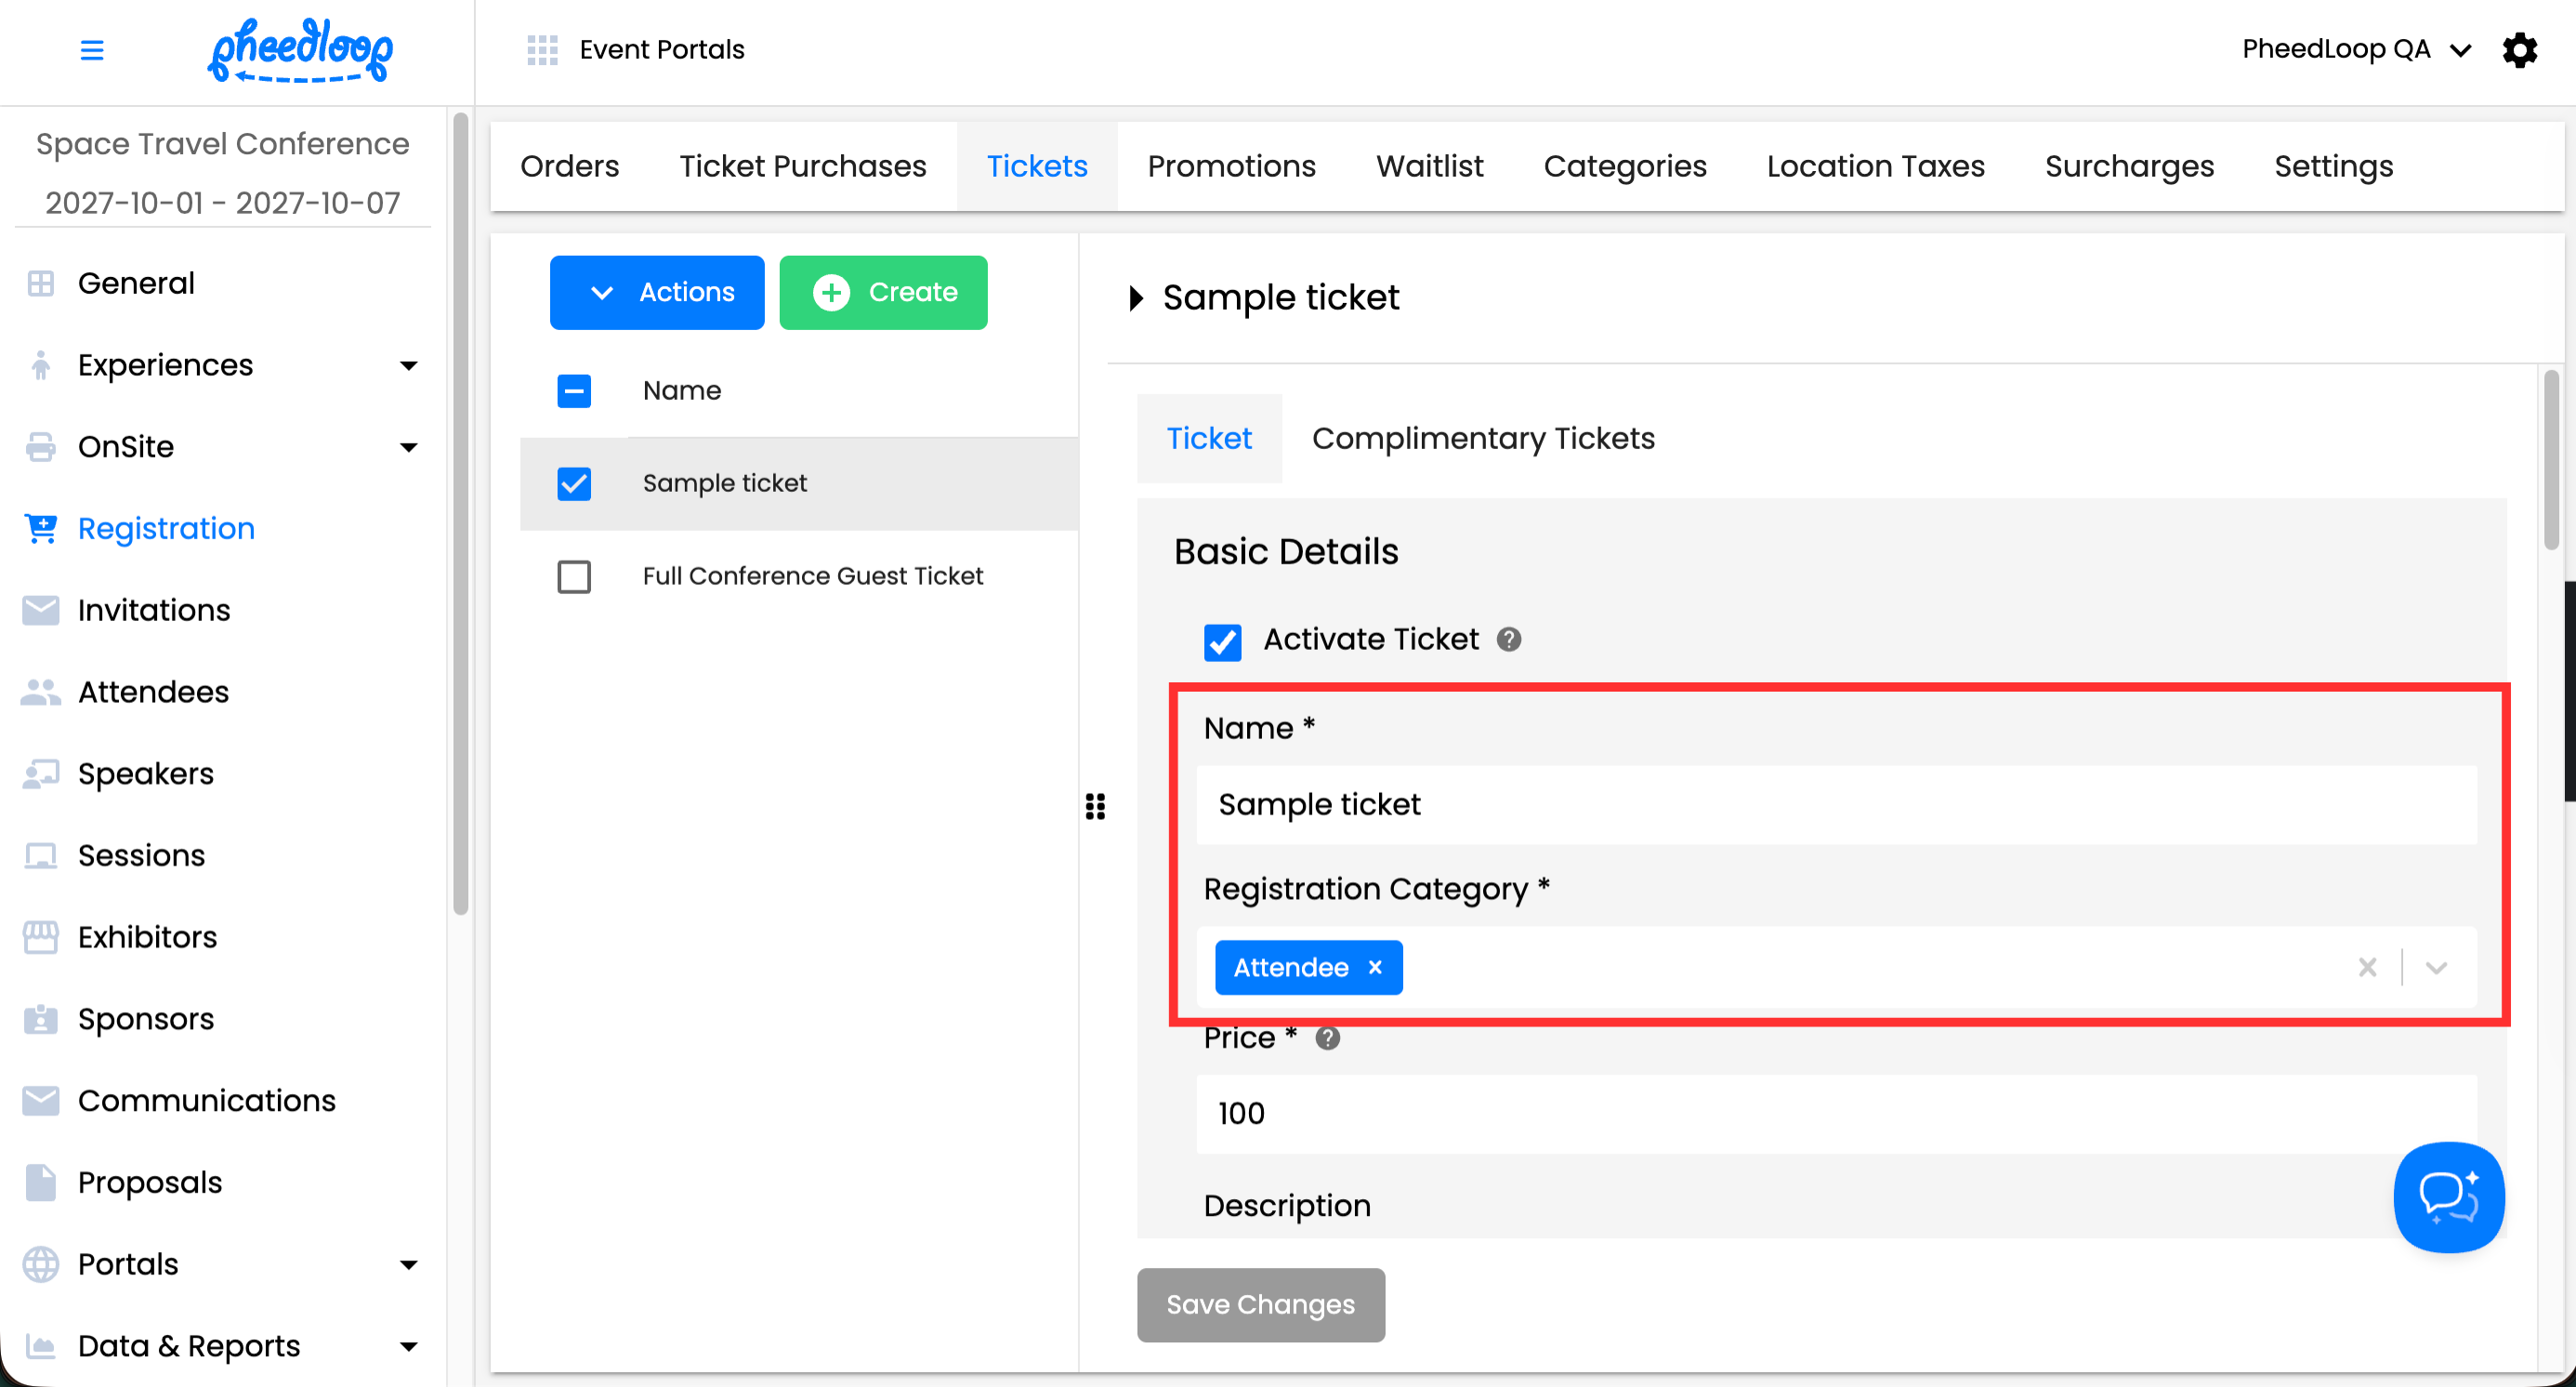
-
Set the Price (leave at 0 for free tickets)

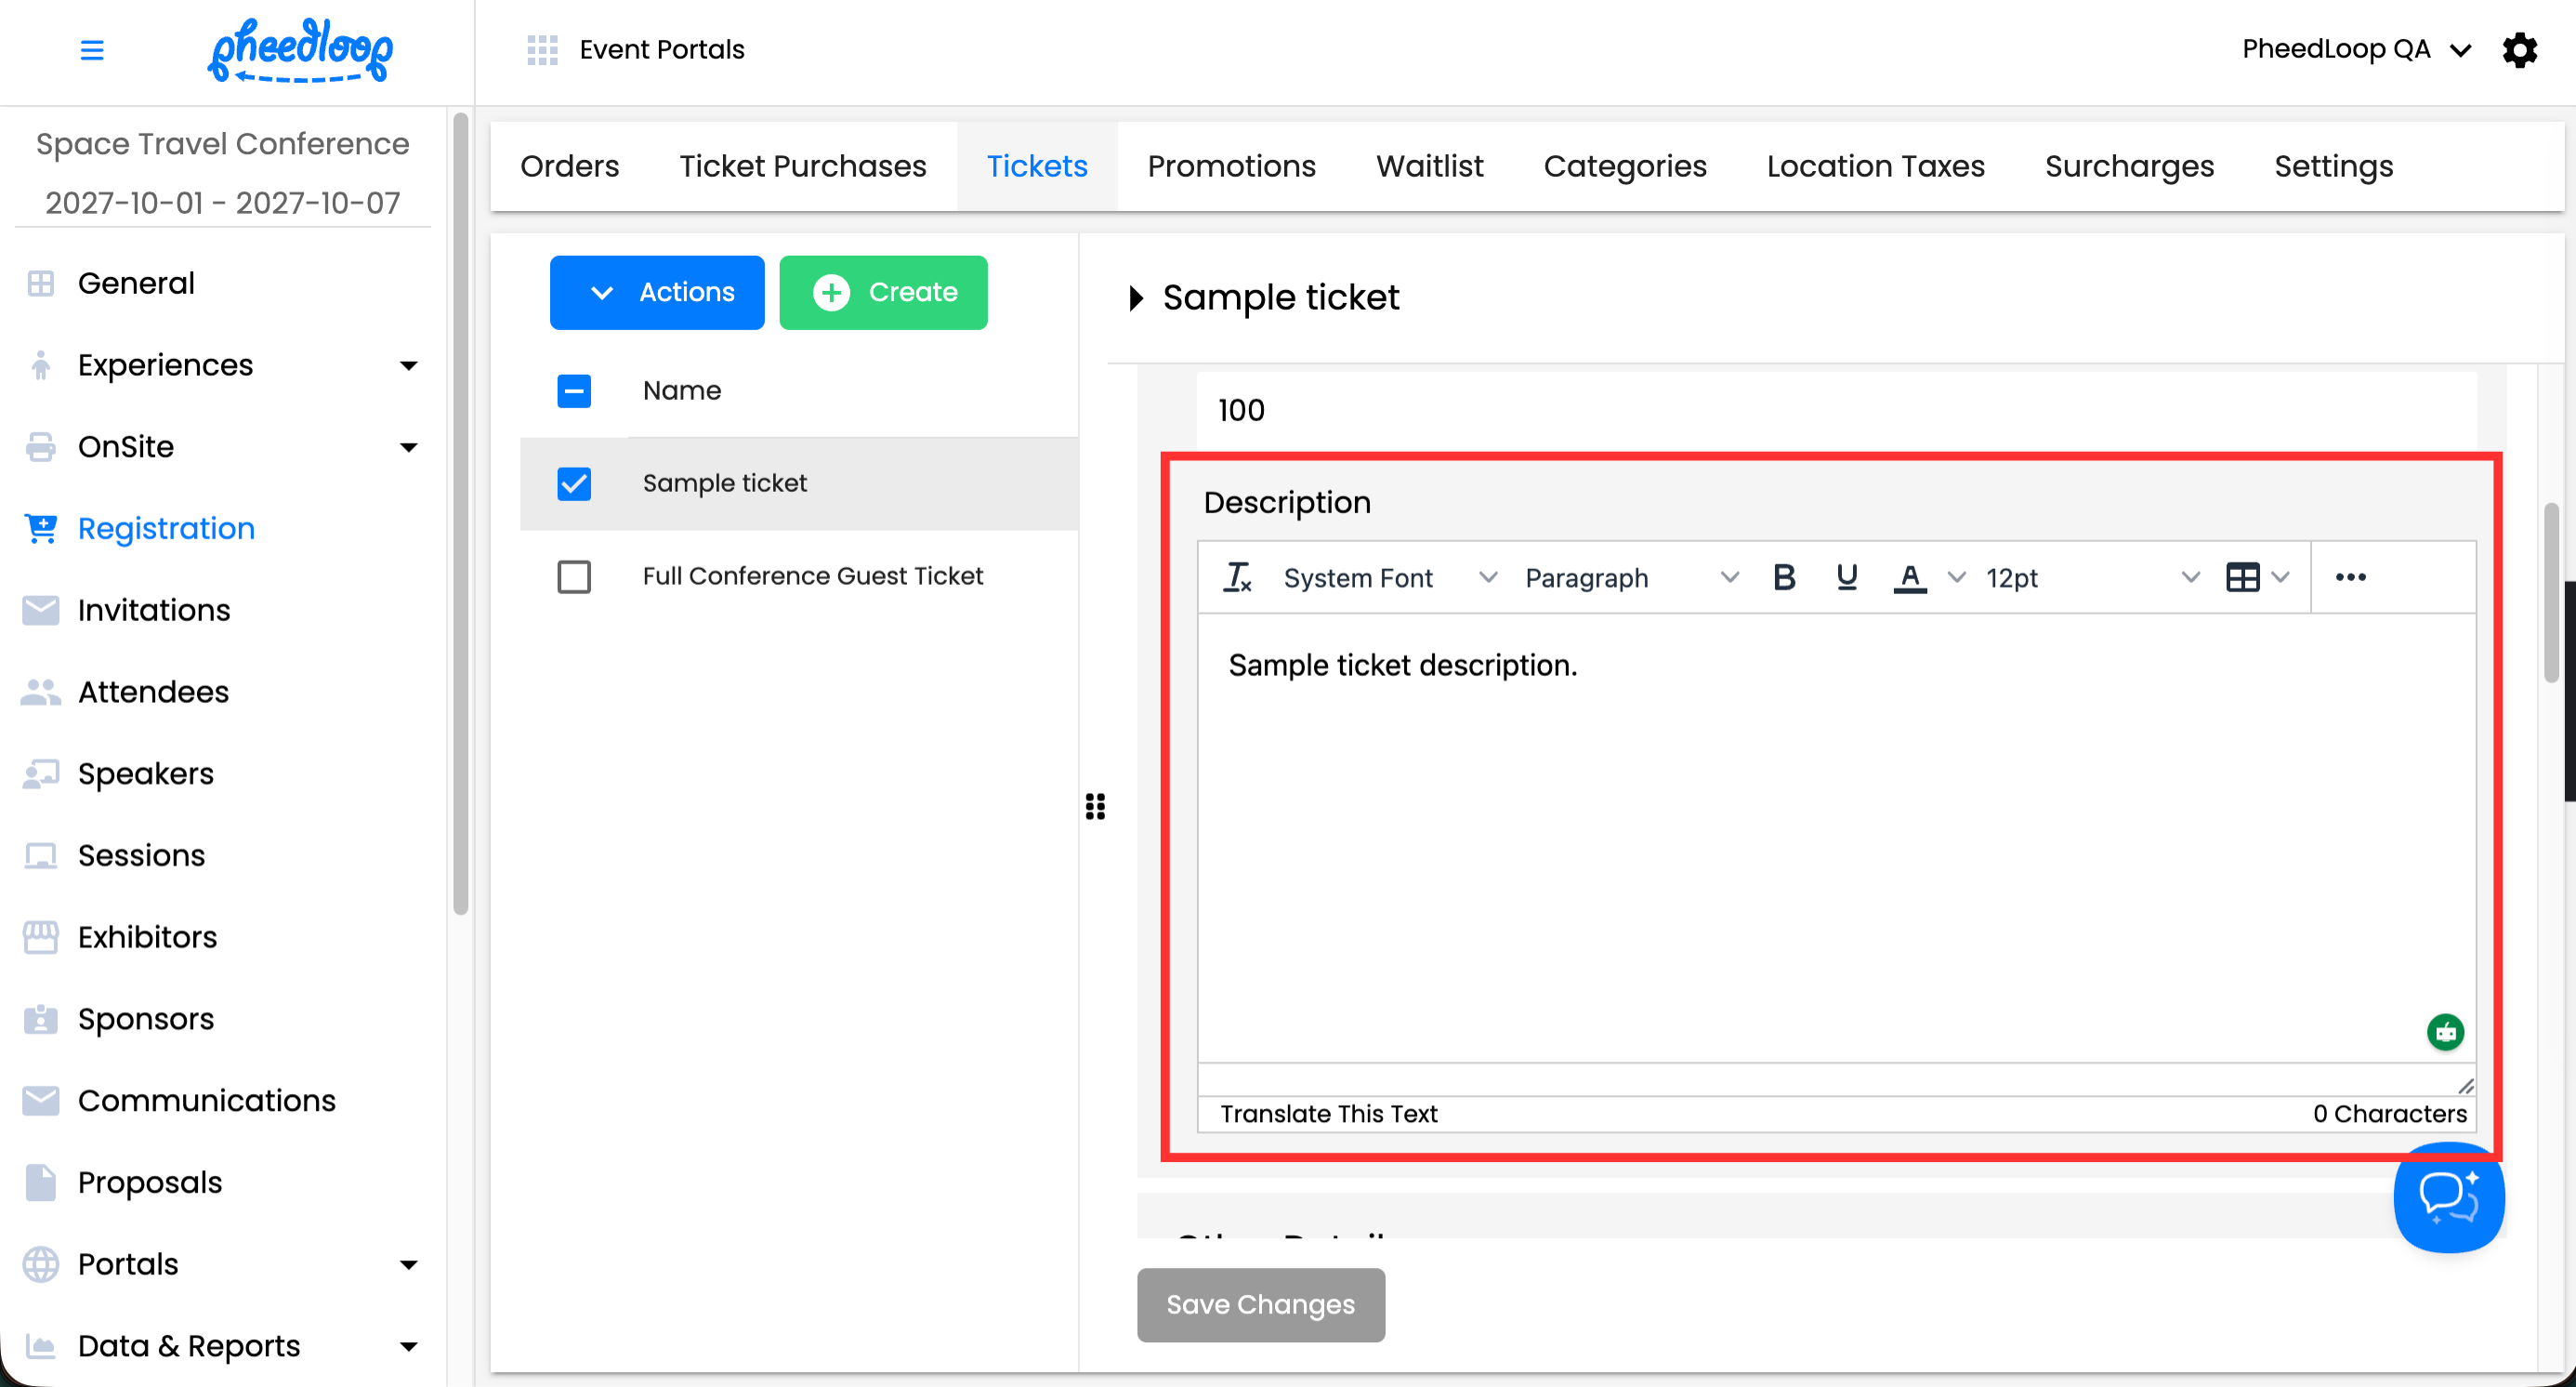
-
Add an optional Description
-
Under Other Details, set: Quantity Available, Minimum Per Order and Maximum Per Order, and Ticket Sale Start Date and Ticket Sale End Date
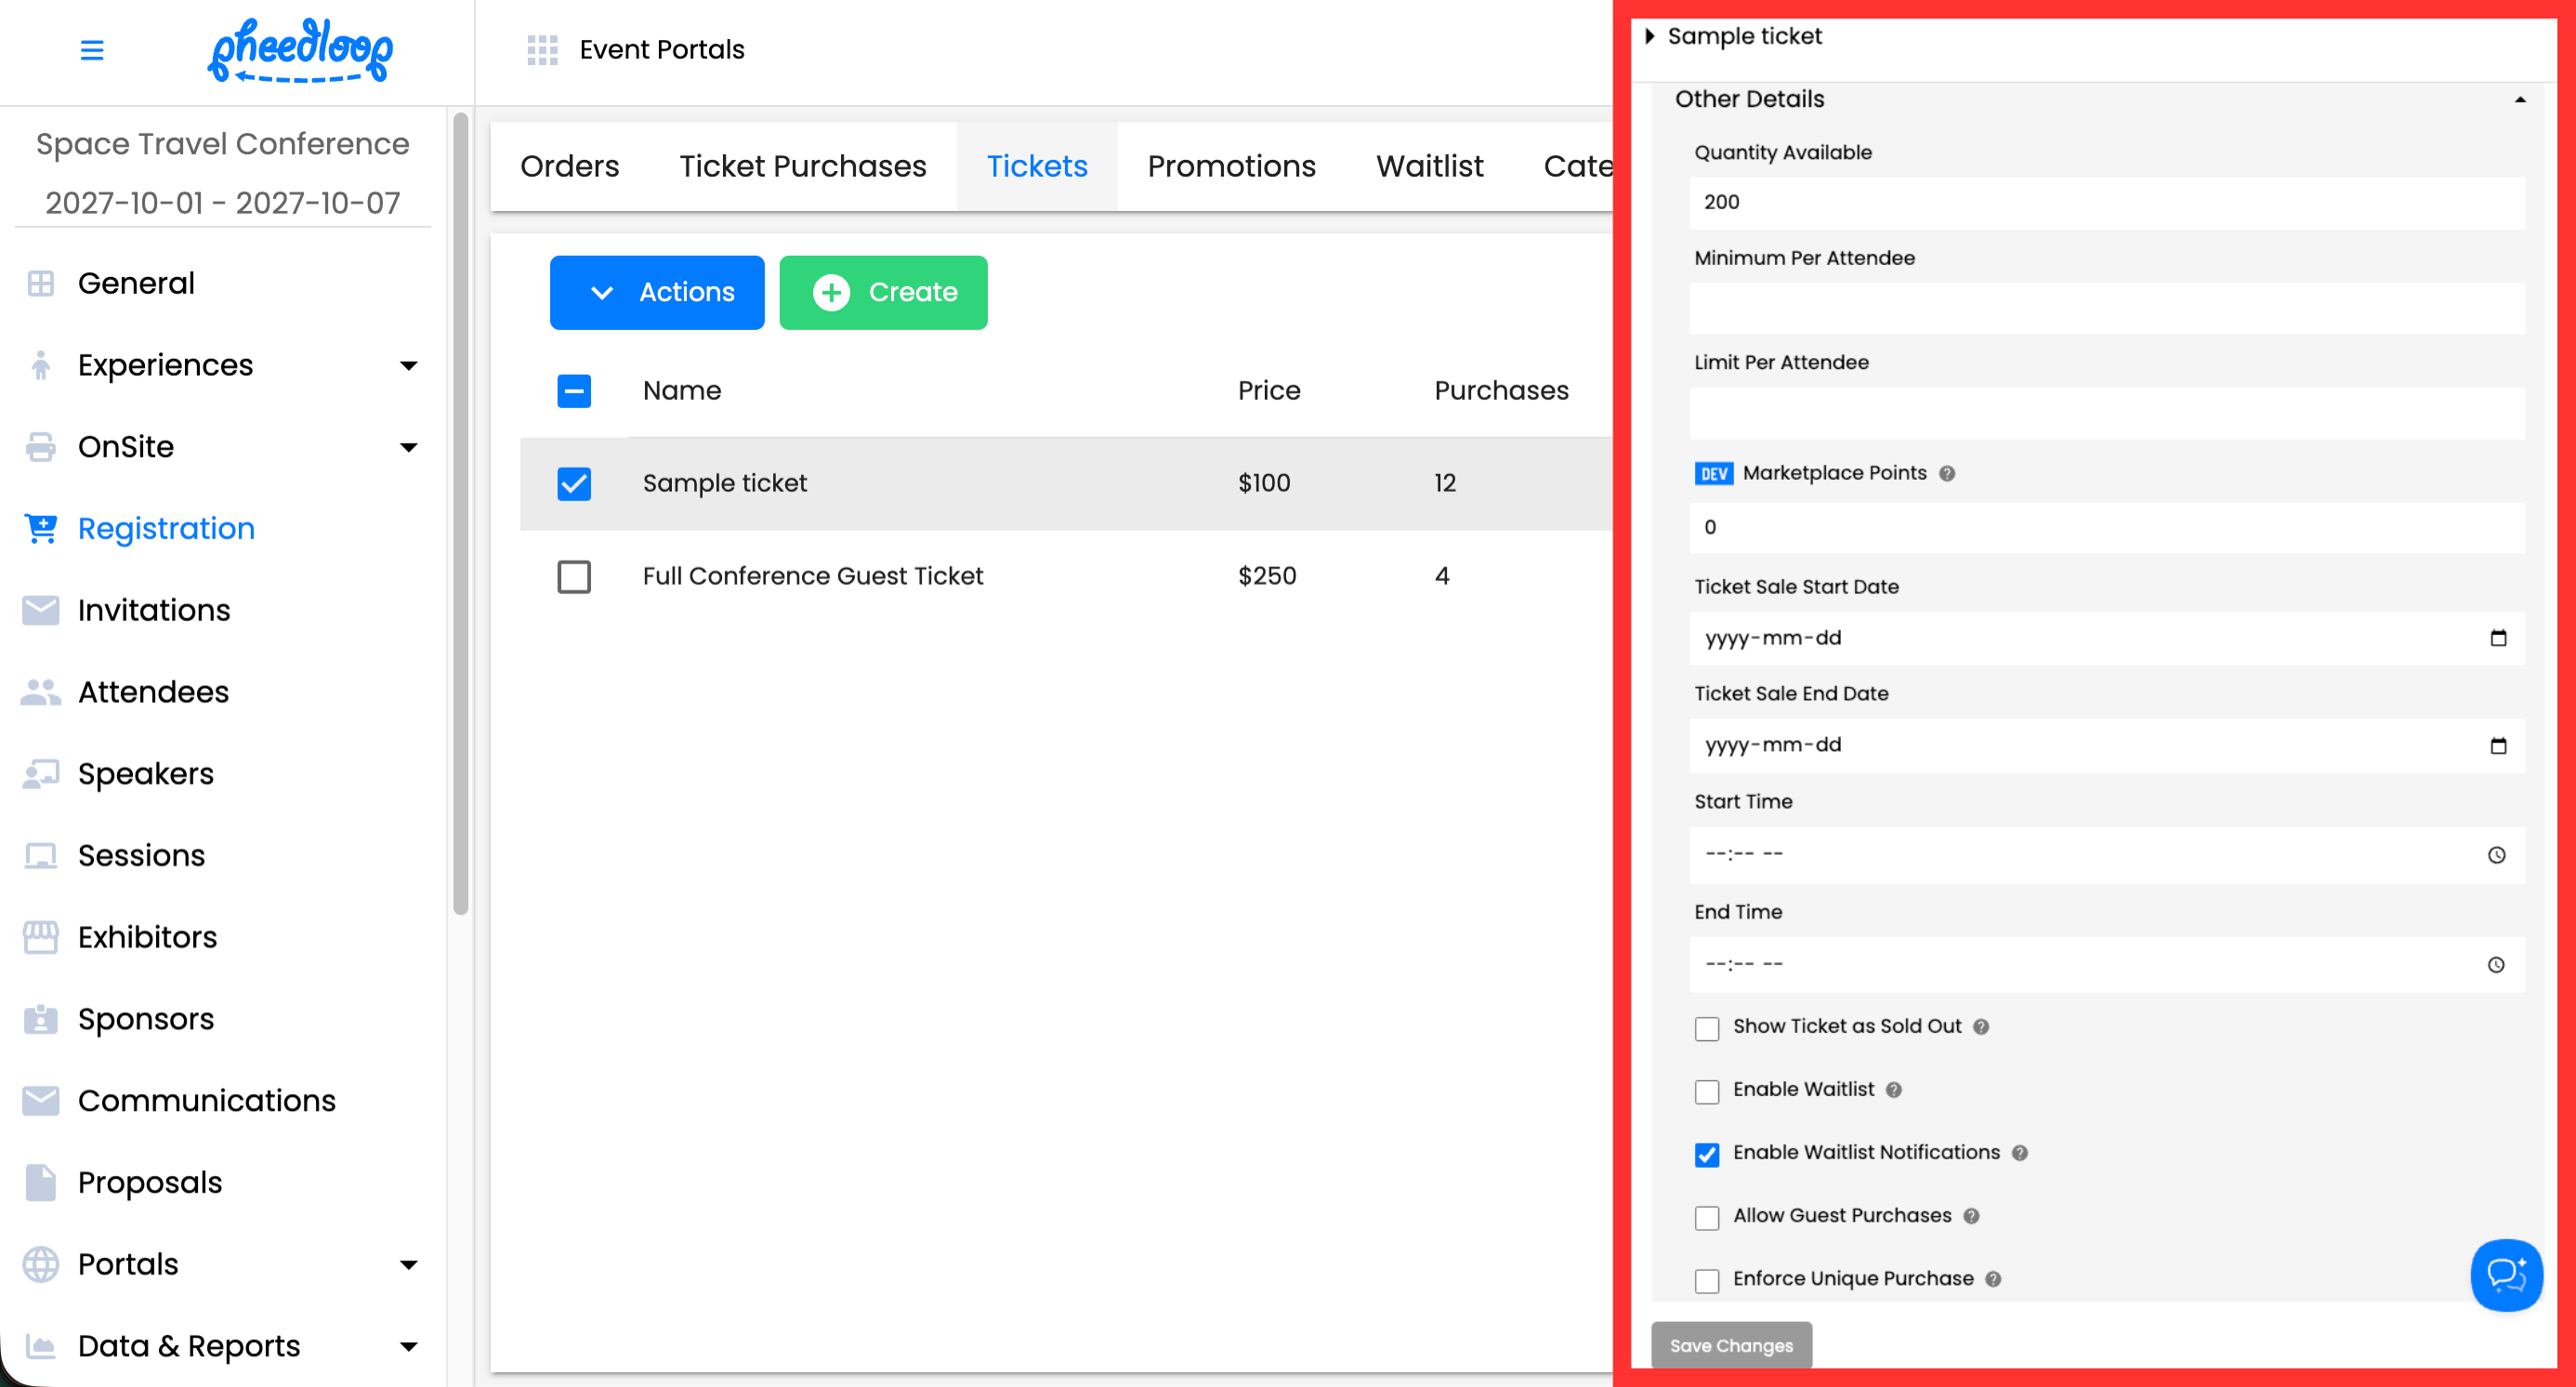
-
Under Options, enable Add On Ticket if it must be purchased alongside a main ticket (e.g., workshops, dinners)
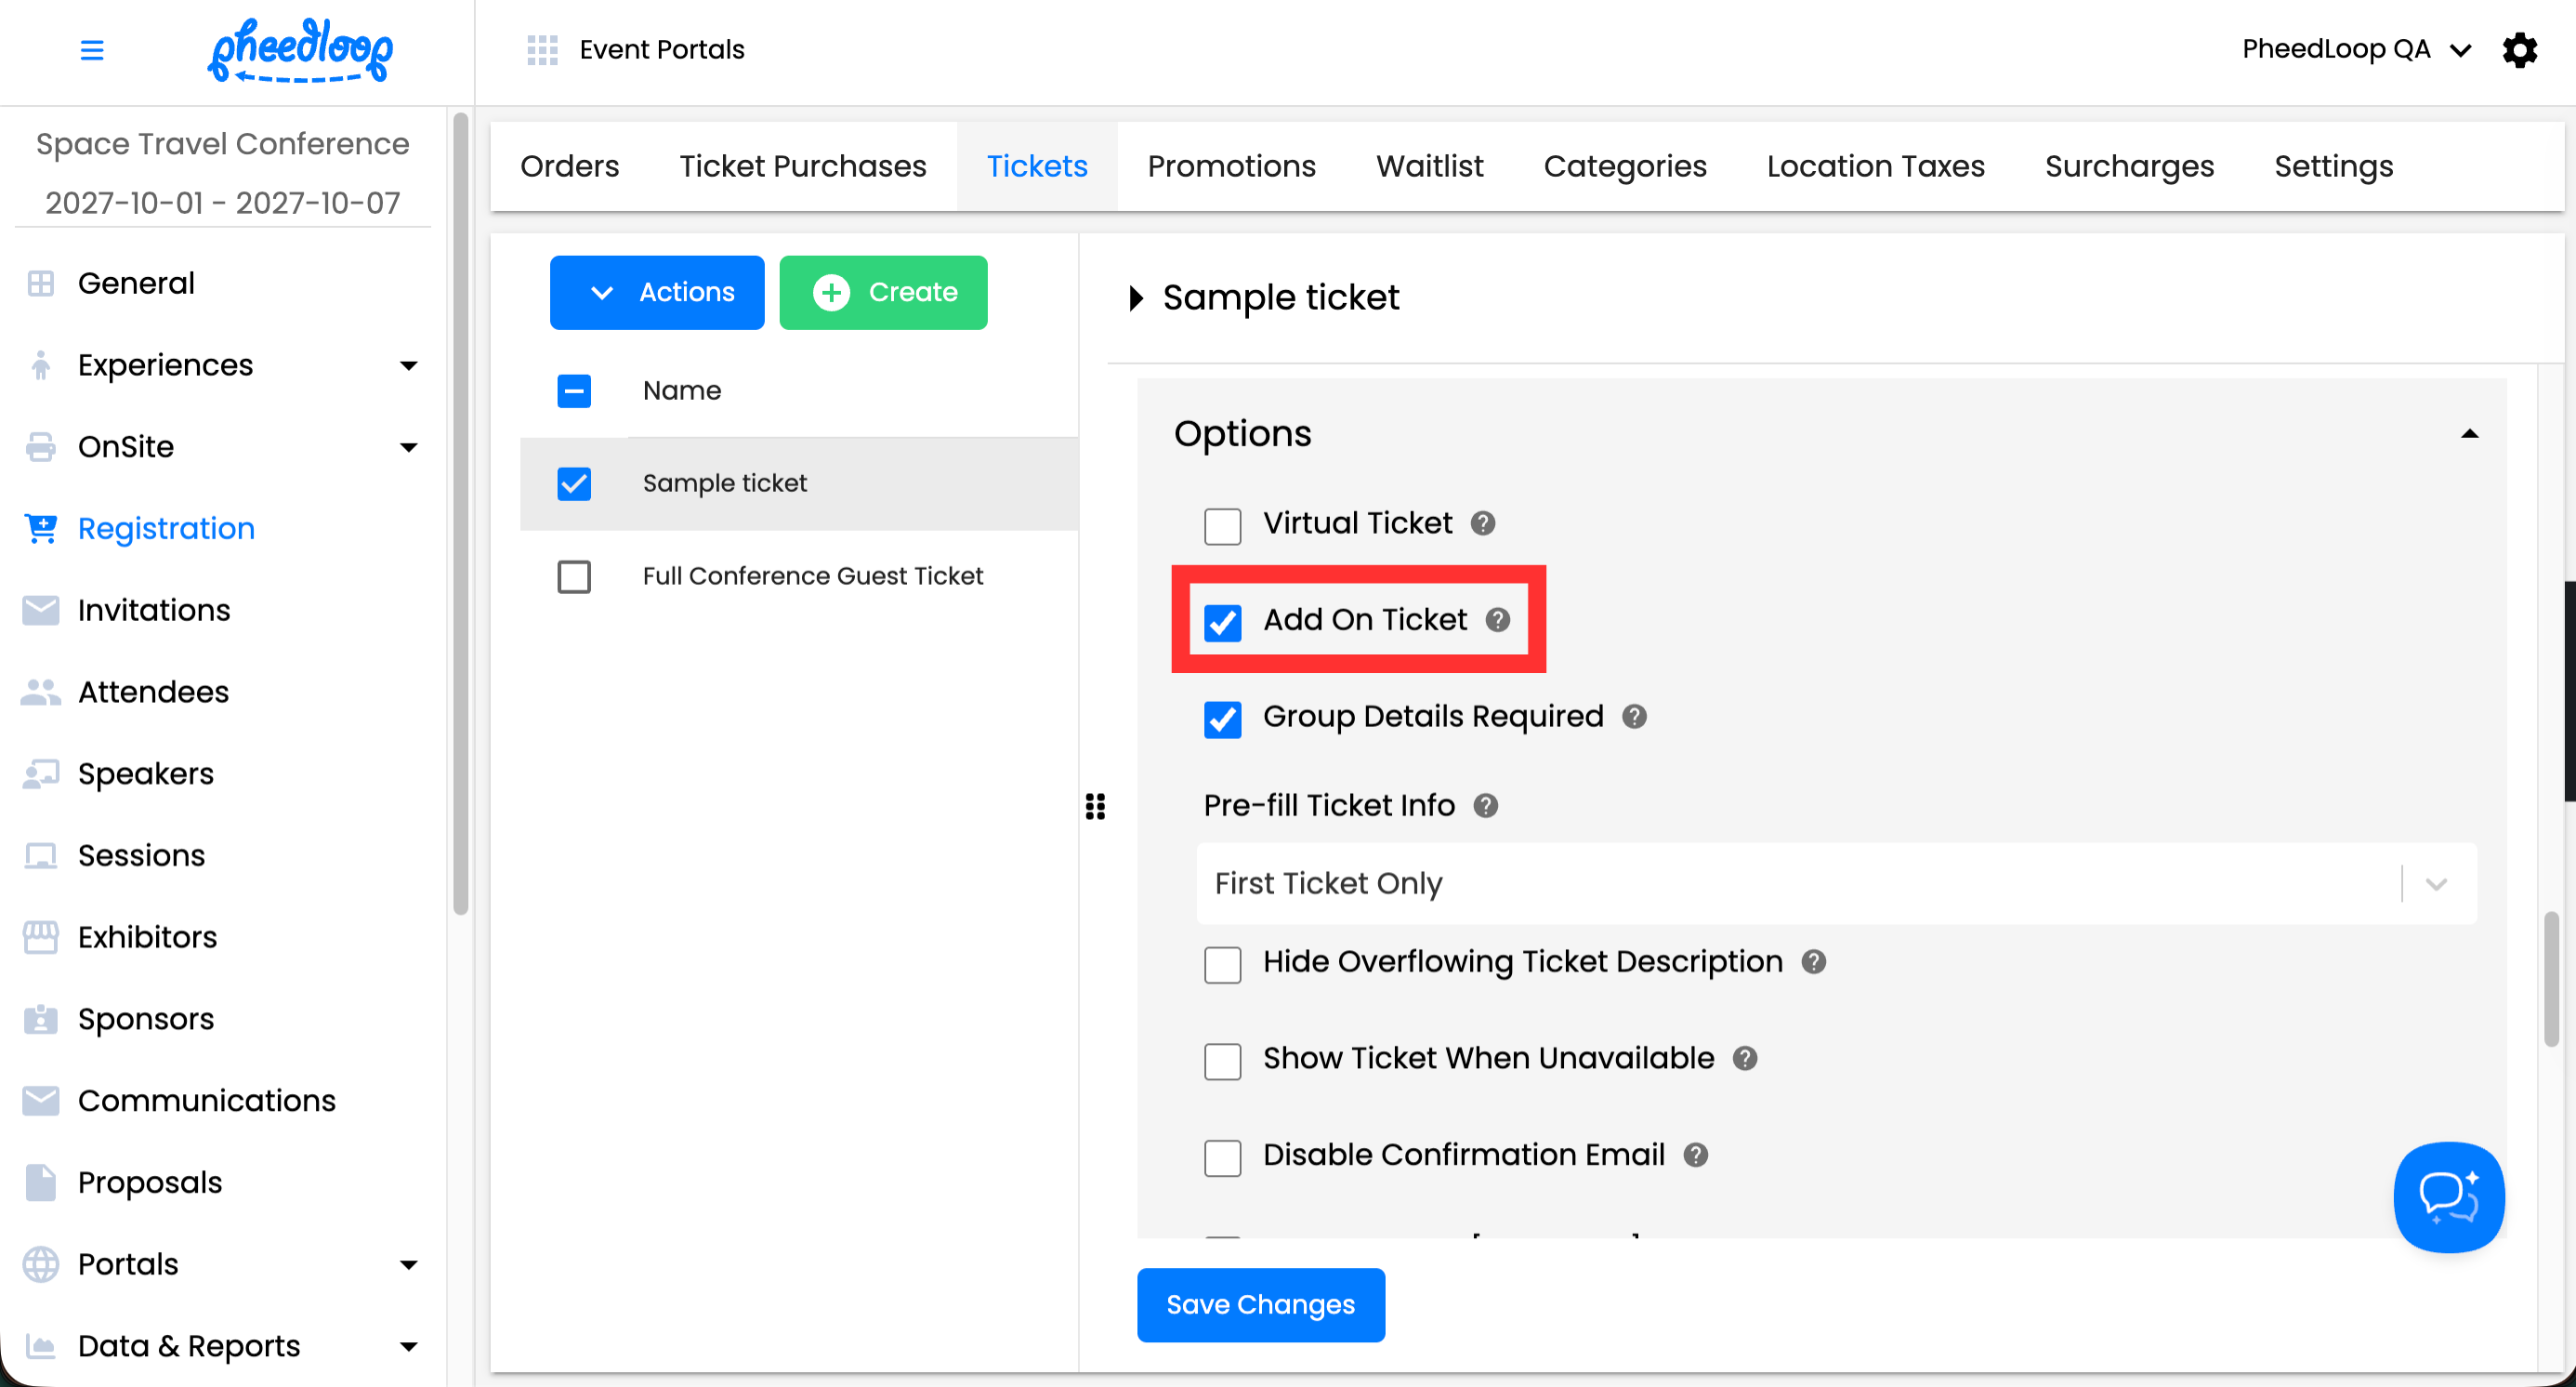
- Select Save Changes


Key Roles: Registrants, Ticket Holders & Attendees
Registrant
A Registrant is the individual who completes the registration order and processes payment. When group registration is enabled, a single registrant can purchase tickets for themselves and others in one order. Example: George registers for a conference and purchases three tickets, one for himself and two for his coworkers. George is the Registrant.
Ticket Holder
A Ticket Holder is any individual who possesses at least one ticket, whether they registered themselves or were registered by someone else. Once a registration order is completed, Attendee Profiles are automatically created for each Ticket Holder in the Event Dashboard. In the example above, George and both coworkers are Ticket Holders.
Attendee
An Attendee is the person who actually uses their ticket to participate in the event (in person or virtually). In the example above, all three people who show up on the day of the conference are Attendees, even though only George was the Registrant.
User Credits
A User is anyone registered for a unique event, including attendees, speakers, and exhibit staff. The same individual registered across two separate events counts as two users.
User credits represent the total number of attendees you are allowed to host across all events in your organization.
Key things to know:
- Any event with fewer than 100 attendees qualifies as a Free Event;, those attendees do not count toward your user credits.
- Once an event exceeds 100 attendees, the free tier no longer applies and all attendees in that event count toward your balance.
- Removing an attendee from an upcoming event returns that credit to your account.
- Once an event has passed, user credits are redeemed and cannot be recovered.